
In this tutorial I will add an image on top of another image. This is usefull if you want to mark an image as yours and prevent others from using it on their website. When a co-worker asked me how to do this, I had to figure it out myself. This is only one way of doing this. There are many ways of doing things like this.
I am assuming that you have at least version 5 of Adobe Photoshop installed. As well, i assume that you have enough computer skills to be able to follow these simple directions. If you have problems opening files and checking your e-mail, then you will have problems with this tutorial. In that case, get a friend to sit beside you while you do this. I'm not going to be answering e-mails from every nut job that can't figure out how to save a picture from a webpage.
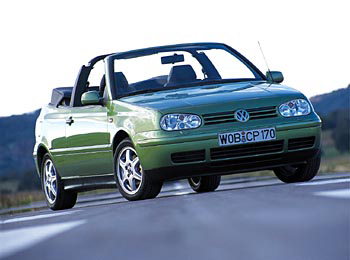
Right click on each of these images and save them to your harddrive. These are the images we will using to create the one single picture.
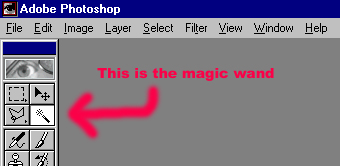
Open both images in Adobe Photoshop. Select the letter E image first. Now choose the magic wand tool from the tool box.
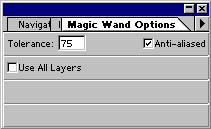
On a small side note, double click the magic wand in the tool box and a small window appears. In it you can set the sensitivity of the wand. In this situation, i find that mine works nice at 4. Change the number as you desire, and then close that window.
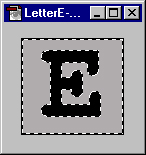
Click the grey area around the outside of the letter E. The entire grey section will be surrounded by a moving dotted line.
Now that you have selected all of the background, press the Delete key on the keyboard, and the selected areas will disappear. The next step is to select the letter E, which is exactly the opposite of what you currently have selected. To do this, choose Inverse from the Select menu (see image below).

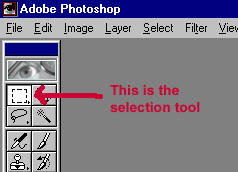
The letter E will now have the dotted lines dancing around it. From the menu, select Edit\Copy. You have just copied just the letter E into the clipboard. Now change to the other picture. Choose the selection tool from the top left corner of the tool box.
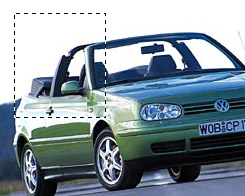
Draw a box on the picture, any size/location you want.
From the menu, choose Edit\Paste. The letter E will now appear on the image in the square you had highligthed.
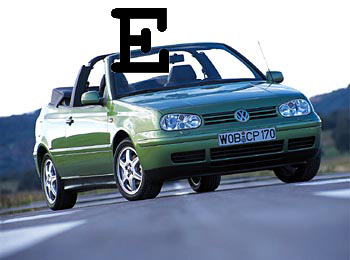
Now we need to flatten all the layers, so select Layer\Flatten Image from the menu. You now have a completed image that looks like the picture above. As always, i recommend that you practise doing this a few more times until you have it perfected.
| back to top of page |